Table of Contents
How to Use the PDF to Image Converter Tool
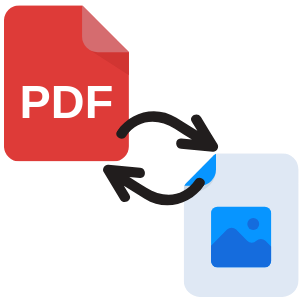
Welcome to our guide on how to use the PDF to Image Converter tool. This tool is designed to help you easily convert your PDF files into image formats such as JPEG, PNG, and TIFF. Whether you need to extract images from a PDF document or convert the entire document into image files, our tool provides a simple and efficient solution. In this guide, we will walk you through the process step by step, so you can quickly and effortlessly convert your PDF files into images.
Step 1: Access the PDF to Image Converter Tool
The first step is to access the PDF to Image Converter tool. You can do this by visiting our website and navigating to the converter tool section. Once you have found the tool, click on it to open the converter interface.
Step 2: Upload your PDF File
Once you have accessed the PDF to Image Converter tool, you will need to upload the PDF file that you want to convert. To do this, click on the “Upload” button or drag and drop the PDF file directly into the designated area on the converter interface. You can convert multiple PDF files at once by uploading them simultaneously.
Step 3: Choose the Output Image Format
After uploading your PDF file, you will need to choose the output image format. Our PDF to Image Converter tool supports various image formats, including JPEG, PNG, and TIFF. Simply select the desired format from the available options.
Step 4: Customize Conversion Settings (Optional)
If you want to customize the conversion settings, you can do so in this step. Our PDF to Image Converter tool offers several options to enhance the output images. You can choose the image resolution, adjust the image quality, and select whether to convert the entire PDF document or specific pages only. These customization options allow you to tailor the conversion process according to your specific needs.
Step 5: Start the Conversion Process
Once you have uploaded your PDF file and customized the conversion settings (if desired), you are ready to start the conversion process. Simply click on the “Convert” or “Start” button to initiate the conversion. Depending on the size of your PDF file and the selected output format, the conversion process may take a few moments.
Step 6: Download the Converted Images
After the conversion process is complete, you will be provided with a link to download the converted images. Click on the download link to save the images to your computer or device. You can choose to download each image individually or download them as a compressed zip file.
Step 7: Save and Organize your Converted Images
Once you have downloaded the converted images, it is important to save and organize them properly. Create a dedicated folder on your computer or device to store the images. You can also rename the images to make them more identifiable and easier to manage. Organizing your converted images will help you keep track of them and locate them when needed.
Conclusion
Using the PDF to Image Converter tool is a quick and efficient way to convert your PDF files into image formats. Whether you need to extract images from a PDF document or convert the entire document into image files, our tool provides a user-friendly solution. By following the steps outlined in this guide, you can easily convert your PDF files into images and save them for further use. We hope this guide has been helpful, and we invite you to try our PDF to Image Converter tool for all your conversion needs.